Spudgers, Picks and Everything In Between — Complete iPhone Opening Tools Guide
March 29, 2026

Opening an iPhone requires precision and the right tools. Apple's iPhones are engineered for maximum sealing — which makes every repair a real challenge. The right tools are the difference between a successful repair and a cracked screen, torn connector, or broken cable.
This guide covers every essential opening tool — from spudgers and picks to blades, suction cups, and opening cards — and explains when and how to use each one.
What Makes iPhone Opening Unique?
- Adhesive: Strips of adhesive run along the perimeter of the display and/or back glass. It softens with heat.
- Pentalobe Screws: Two star-shaped screws at the bottom — must be removed using a P2 driver before any opening.
Starting with iPhone 8, Apple moved to a glass back panel, creating two separate entry points — each requiring different tools and techniques.
Two Opening Paths
Front Display (Display Assembly)
On iPhone X and later, the screen opens to the left (like a book). On older models (6–8), it lifts upward. Always open to the left — the FaceID cable runs along the right/top on X and later.
Rear Glass (iPhone 8 and later)
The back glass is held by strong adhesive. Heat at 70–80°C softens it, and a dedicated back glass removal tool levers it free. Without the right tool, the rear glass almost always cracks.
Opening Tools — Detailed Guide
1. Spudger — The Most Essential Tool
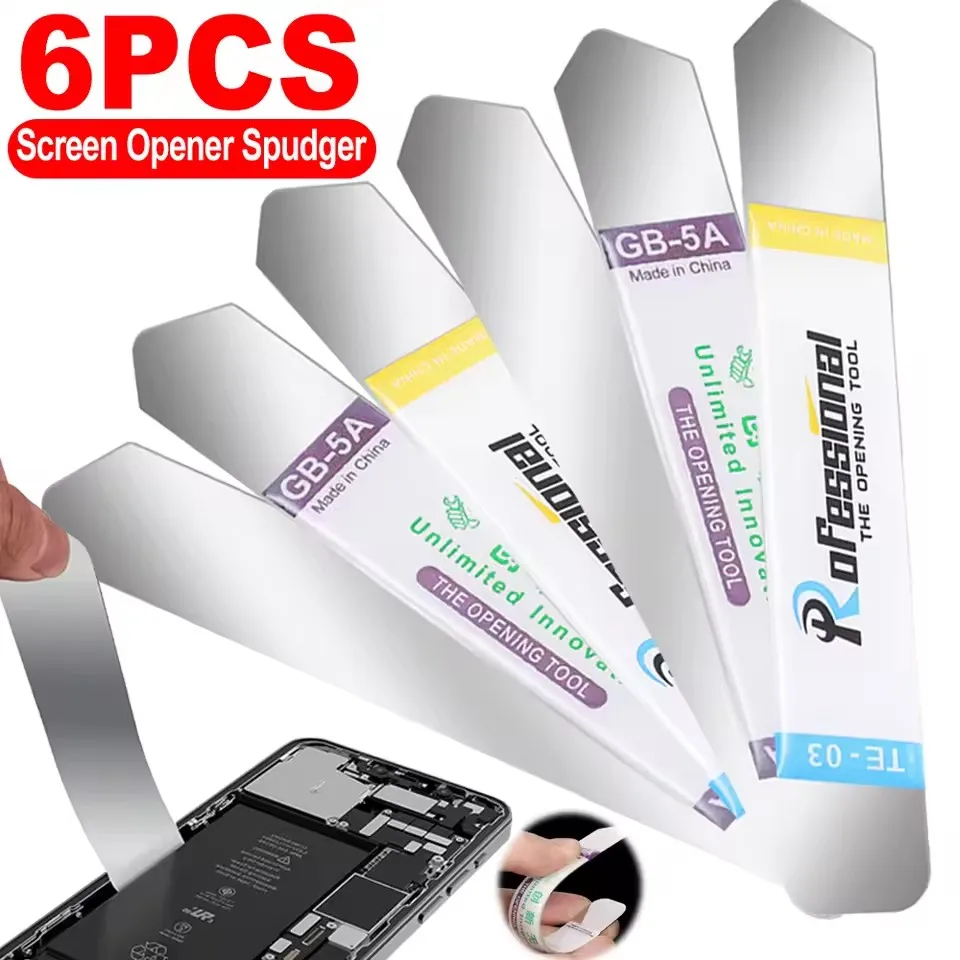
A flat lever with a flat end and a pointed end. Nearly every internal operation involves a spudger: releasing ZIF connectors, lifting flex cables, and separating adhesive along frames.
Rule of thumb: Plastic spudger for internal components. Metal spudger for frame separation and external adhesive.
2. Guitar Pick
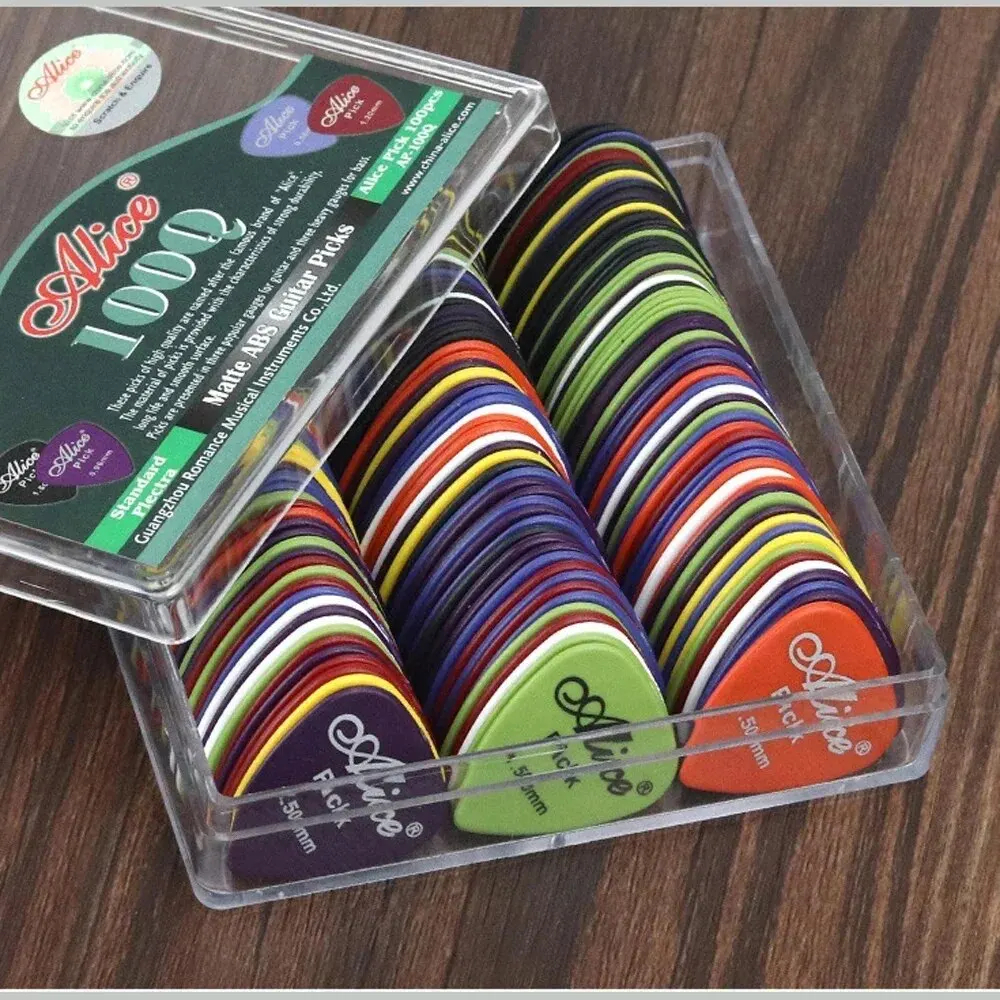
The most widely used iPhone opening tool. Thin, triangular shape slides gently along the adhesive strip. Leave 2–3 picks in position to keep the gap open as you work around the perimeter.
Pro tip: Buy 50–100 at a time. They wear down — and cost almost nothing.
3. Suction Cup
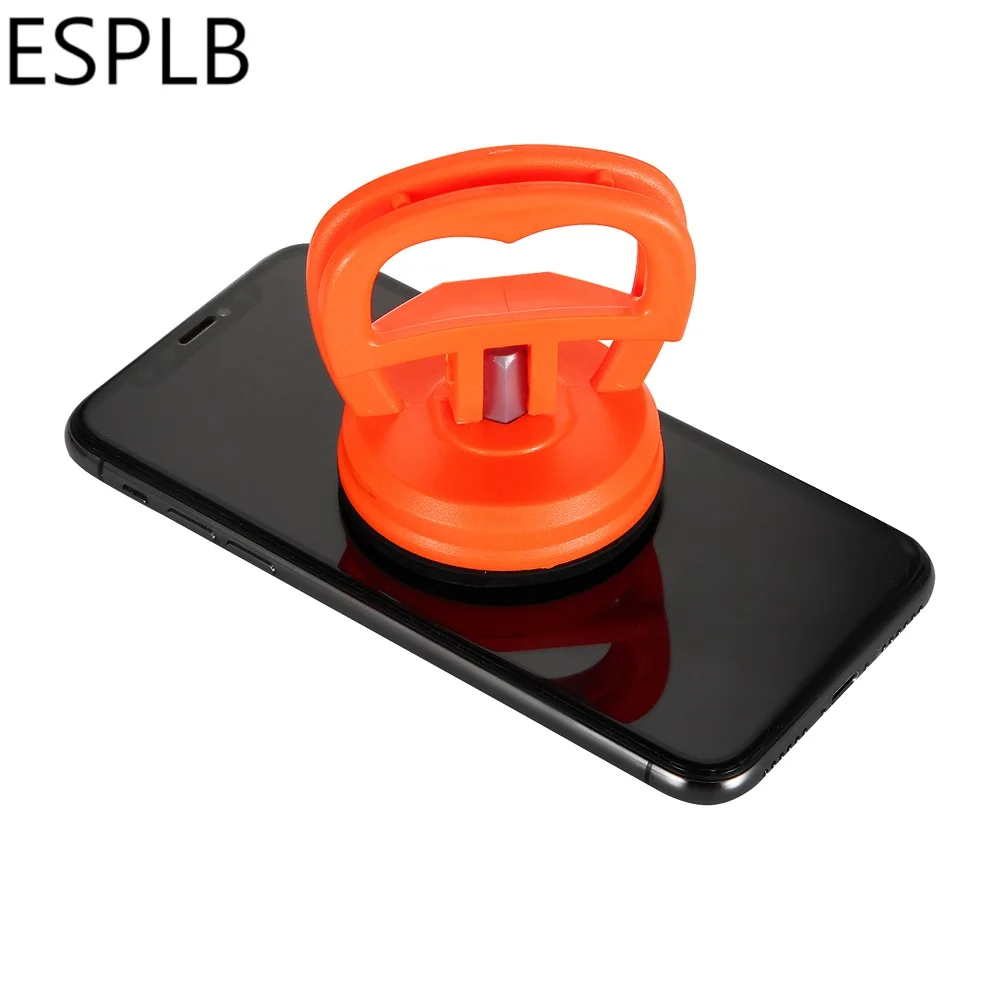
The first tool to touch the screen. Attach near the bottom edge, pull gently upward to create a ~0.5mm gap. For rear glass — use a larger cup.
⚠️ Warning: Too much force will crack the glass. If it won't budge — apply more heat.
4. Metal Opening Blades
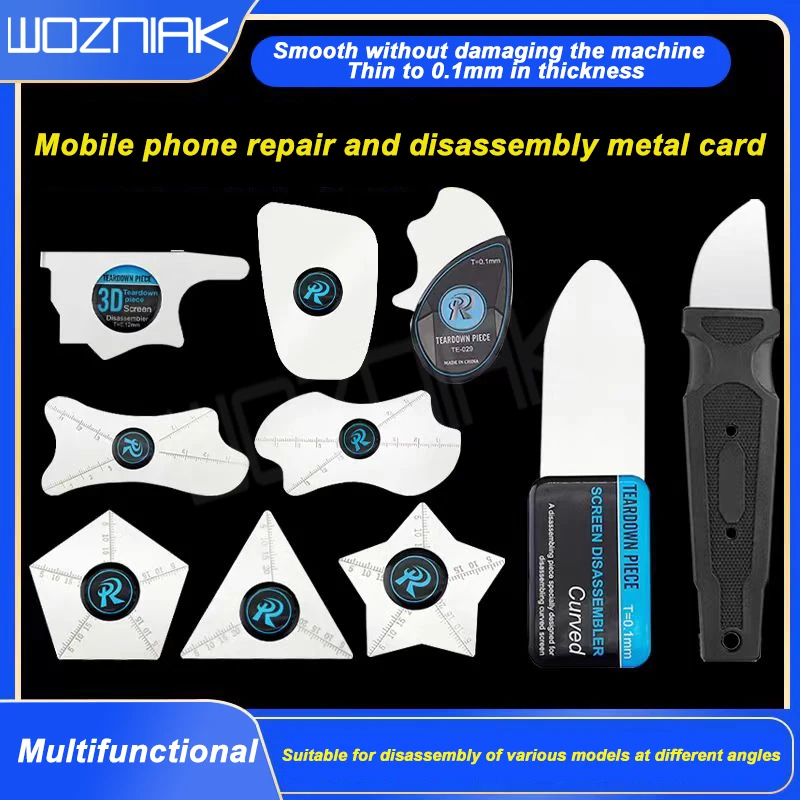
Ultra-thin flexible blades designed to cut through adhesive between screen and frame. Use them after an initial gap is created — the blade widens and completes the separation. Sets include multiple thicknesses for different parts of the perimeter.
5. Anti-Static Opening Card (ESD Safe)

A thin, flexible card (credit-card thickness) with a slightly sharpened edge. Since it doesn't conduct electricity, it's safe to use near active components. Once you use it, you won't want to work without it.
6. Back Glass Removal Tool

For iPhone 8 and above — the rear glass is held by strong adhesive. After targeted heating, this tool is wedged under a corner and separates the glass safely. Without it, rear glass almost always breaks.
Demo Videos
Step-by-Step: Opening iPhone 12–16
- Power off the device
- Remove P2 Pentalobe screws — two at the bottom
- Heat the display edge — 60–70°C for 1–2 minutes
- Attach suction cup — near the bottom edge, pull gently for a ~0.5mm gap
- Insert pick/blade — slide along bottom, left, and right edges
- Leave picks in corners — so the adhesive doesn't re-seal
- Open to the left only — maximum angle ~90°
- Disconnect the battery connector — before any further internal work
⚠️ Important: On iPhone X and later, the TrueDepth (FaceID) cable is attached to the upper-right. Opening to the right will tear it. Always open to the left.
Common Mistakes to Avoid
- ❌ Using a regular knife — too sharp, risks cutting internal components
- ❌ Using force — apply more heat instead
- ❌ Opening to the right — FaceID cable is on the right/top on iPhone X–16
- ❌ Not disconnecting the battery — internal short can kill the logic board
- ❌ Conductive tool near connectors — ESD damages components silently
- ❌ Closing without fresh adhesive — original adhesive loses grip after opening


